
Planting the Seeds of Change: How Kids Can Start a Spring Garden to Connect with Earth

Sinaya in the garden
As the winter months start to fade away and the sun starts shining brighter, it's the perfect time to start thinking about gardening. Gardening is not only a fun activity for kids and families, but it's also a great way to connect with our Earth and start making a difference in our environment. By planting a spring garden, children can learn about the importance of sustainability and environmental justice, all while having fun and getting their hands dirty. You’ll also be amazed by how motivated they will be to enjoy what grows. They may not want to eat peas from the store, but they will likely be sure to try them when they grow them!
Step 1: Choosing the Right Spot for Your Garden
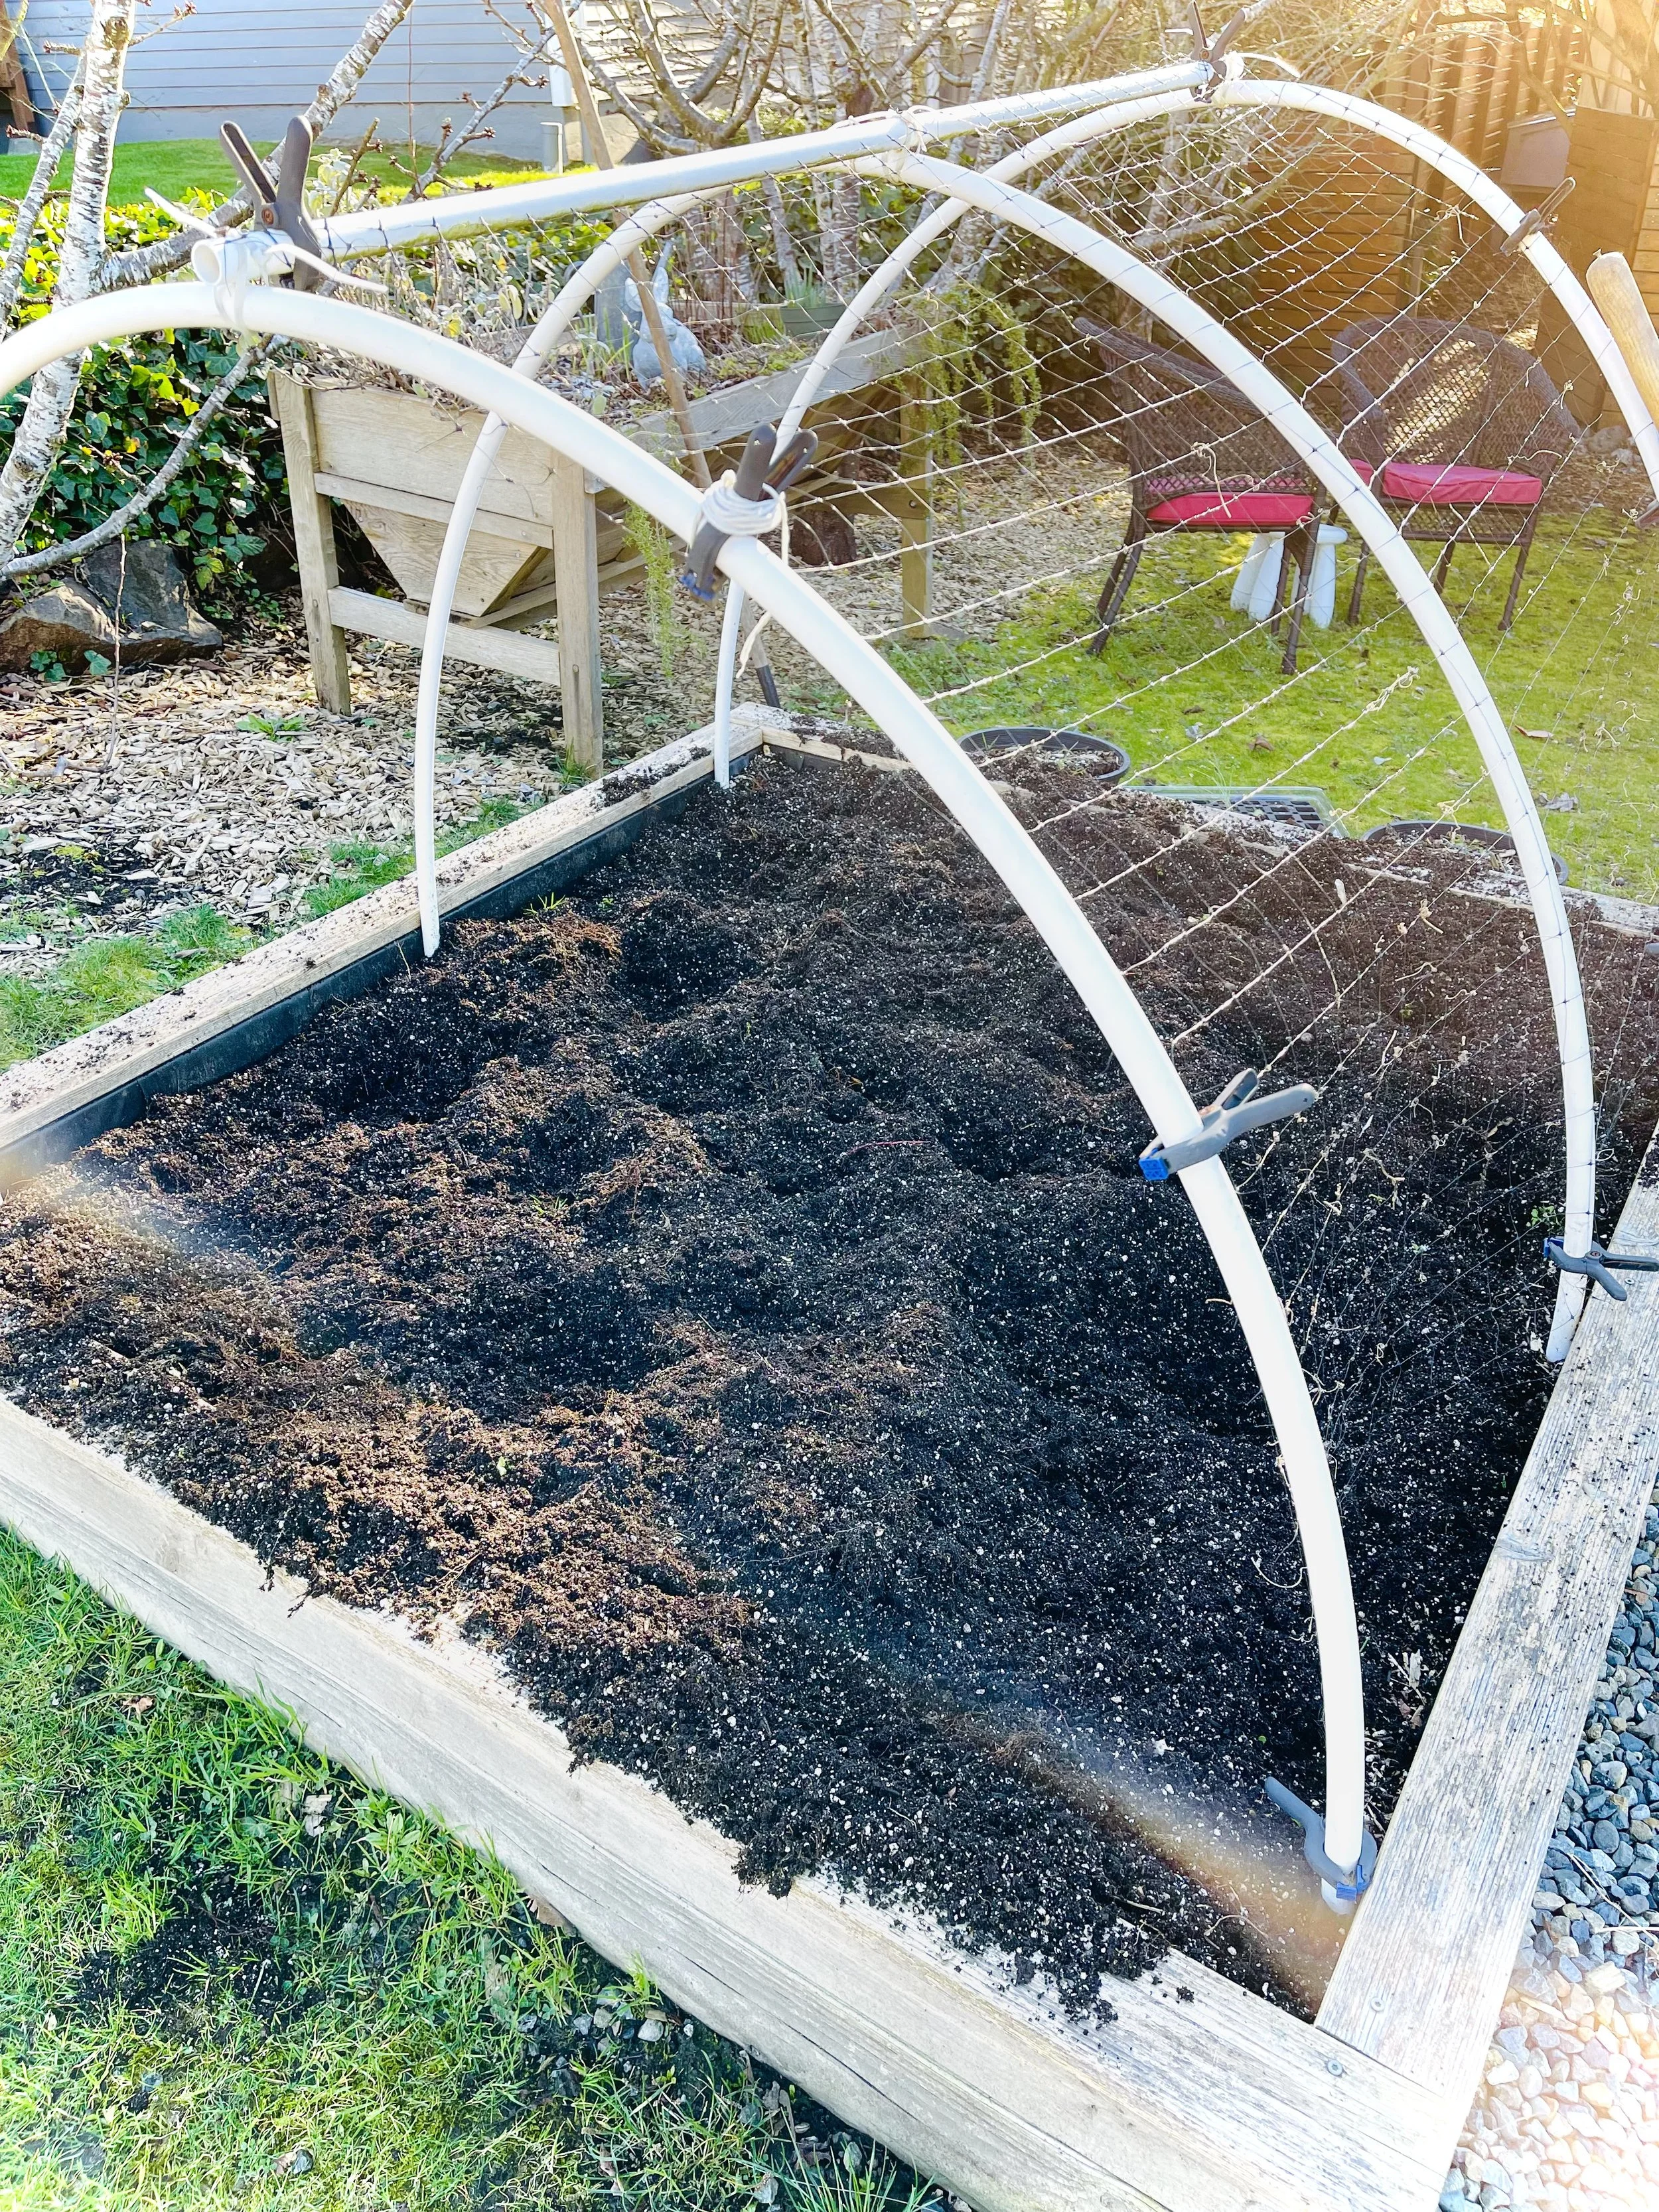
The first step to starting a spring garden is choosing the right spot. Look for an area that gets plenty of sunlight and is well-drained. If you have limited space, consider growing in pots or a raised bed. Look around your garden on a sunny day. Pay attention to the amount of light that shines onto different parts of your garden throughout the day. Some areas will be more shaded, which will be better for cold-hardy plants, like peas, beans, leafy greens, broccoli, and cabbage. Other areas may get full sun throughout the day, which will be better for growing things like tomatoes, squash, cucumber, peppers, and pumpkins, just to name a few. After studying the light in your growing space, you can better decide which plants will be best suited for your area.
Step 2: Choosing What You Want to Grow
Now that you know the best spots you have for growing, you can move on to the next step–choosing what you want to grow. Make sure to choose plants that will thrive based on the amount of light you have. Also, consider your spacing. Plants should be placed several inches apart to allow for growth spread. Your seed packet or nursery tag will give you spacing instructions.
Step 3: Preparing the Soil with Compost
Next, prepare the soil. Buy an organic potting soil mix for fruits and vegetables, or add a top layer of compost to mix into existing soil. Compost is a natural fertilizer from broken-down organic matter that provides important nutrients to plants while also helping to retain moisture in the soil. You can purchase compost or make your own with kitchen scraps and yard waste.
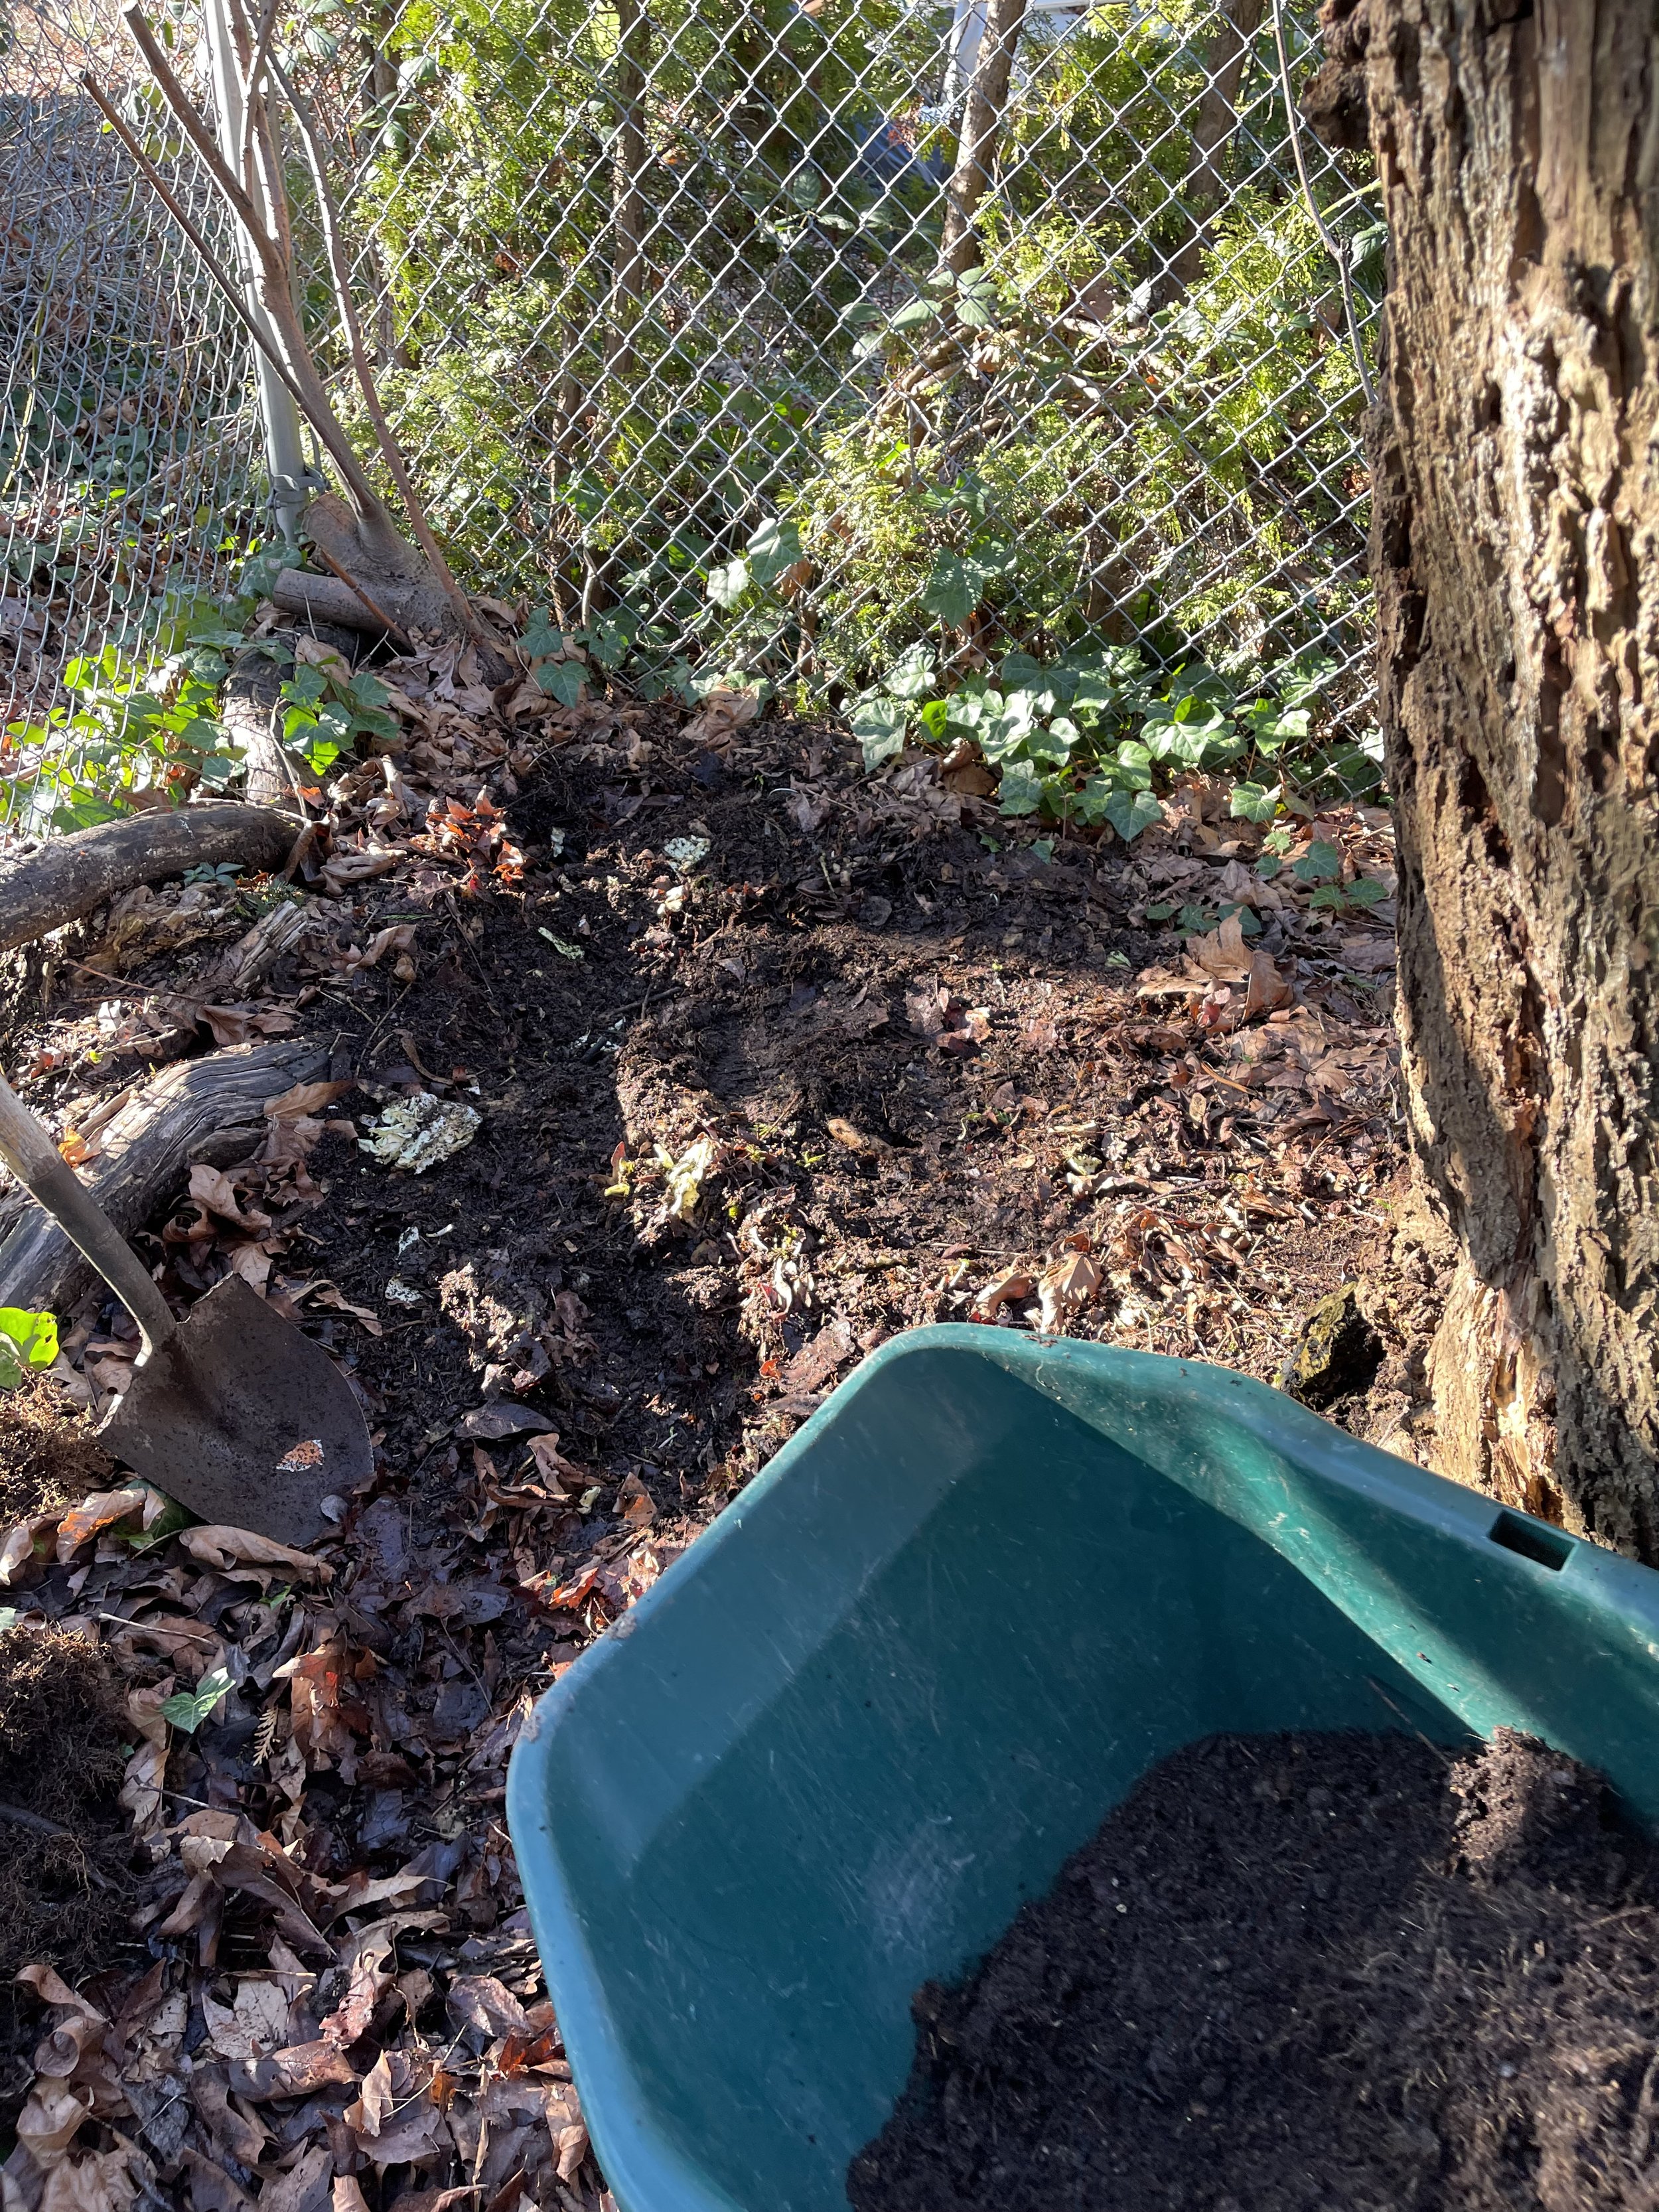
(Pictured Above: Moving our compost from the compost pile into the raised garden bed.)
Step 4: Choosing Non-GMO Organic Seeds, or Transplants, from a Local Nursery
When it comes to choosing seeds and starter plants, it's important to look for non-GMO organic options. This means that the seeds have not been genetically modified and have been grown without the use of harmful chemicals. Check with your local nursery for options or consider purchasing seeds online from reputable sources. We love Baker Creek Heirloom Seed Company at this link.
If you want to purchase nursery starter plants, let them sit outside in their pots for a couple of days to let them acclimate before planting them. When you plant them make sure they are well spaced to allow room for growth and place the top of the root ball level with the soil.
Step 5: Get a Seedling Tray and Fill it with Seedling Mix to Start Your Seeds Indoors
If you live in Seattle in early spring, it still may be too cold for most plantings to grow from seed. To get a head start on your spring garden when the weather is still cool, consider starting your seeds indoors. You can use a seedling tray and fill it with seedling mix, which is specifically designed for starting seeds. Although less ideal, you can also use regular potting soil.
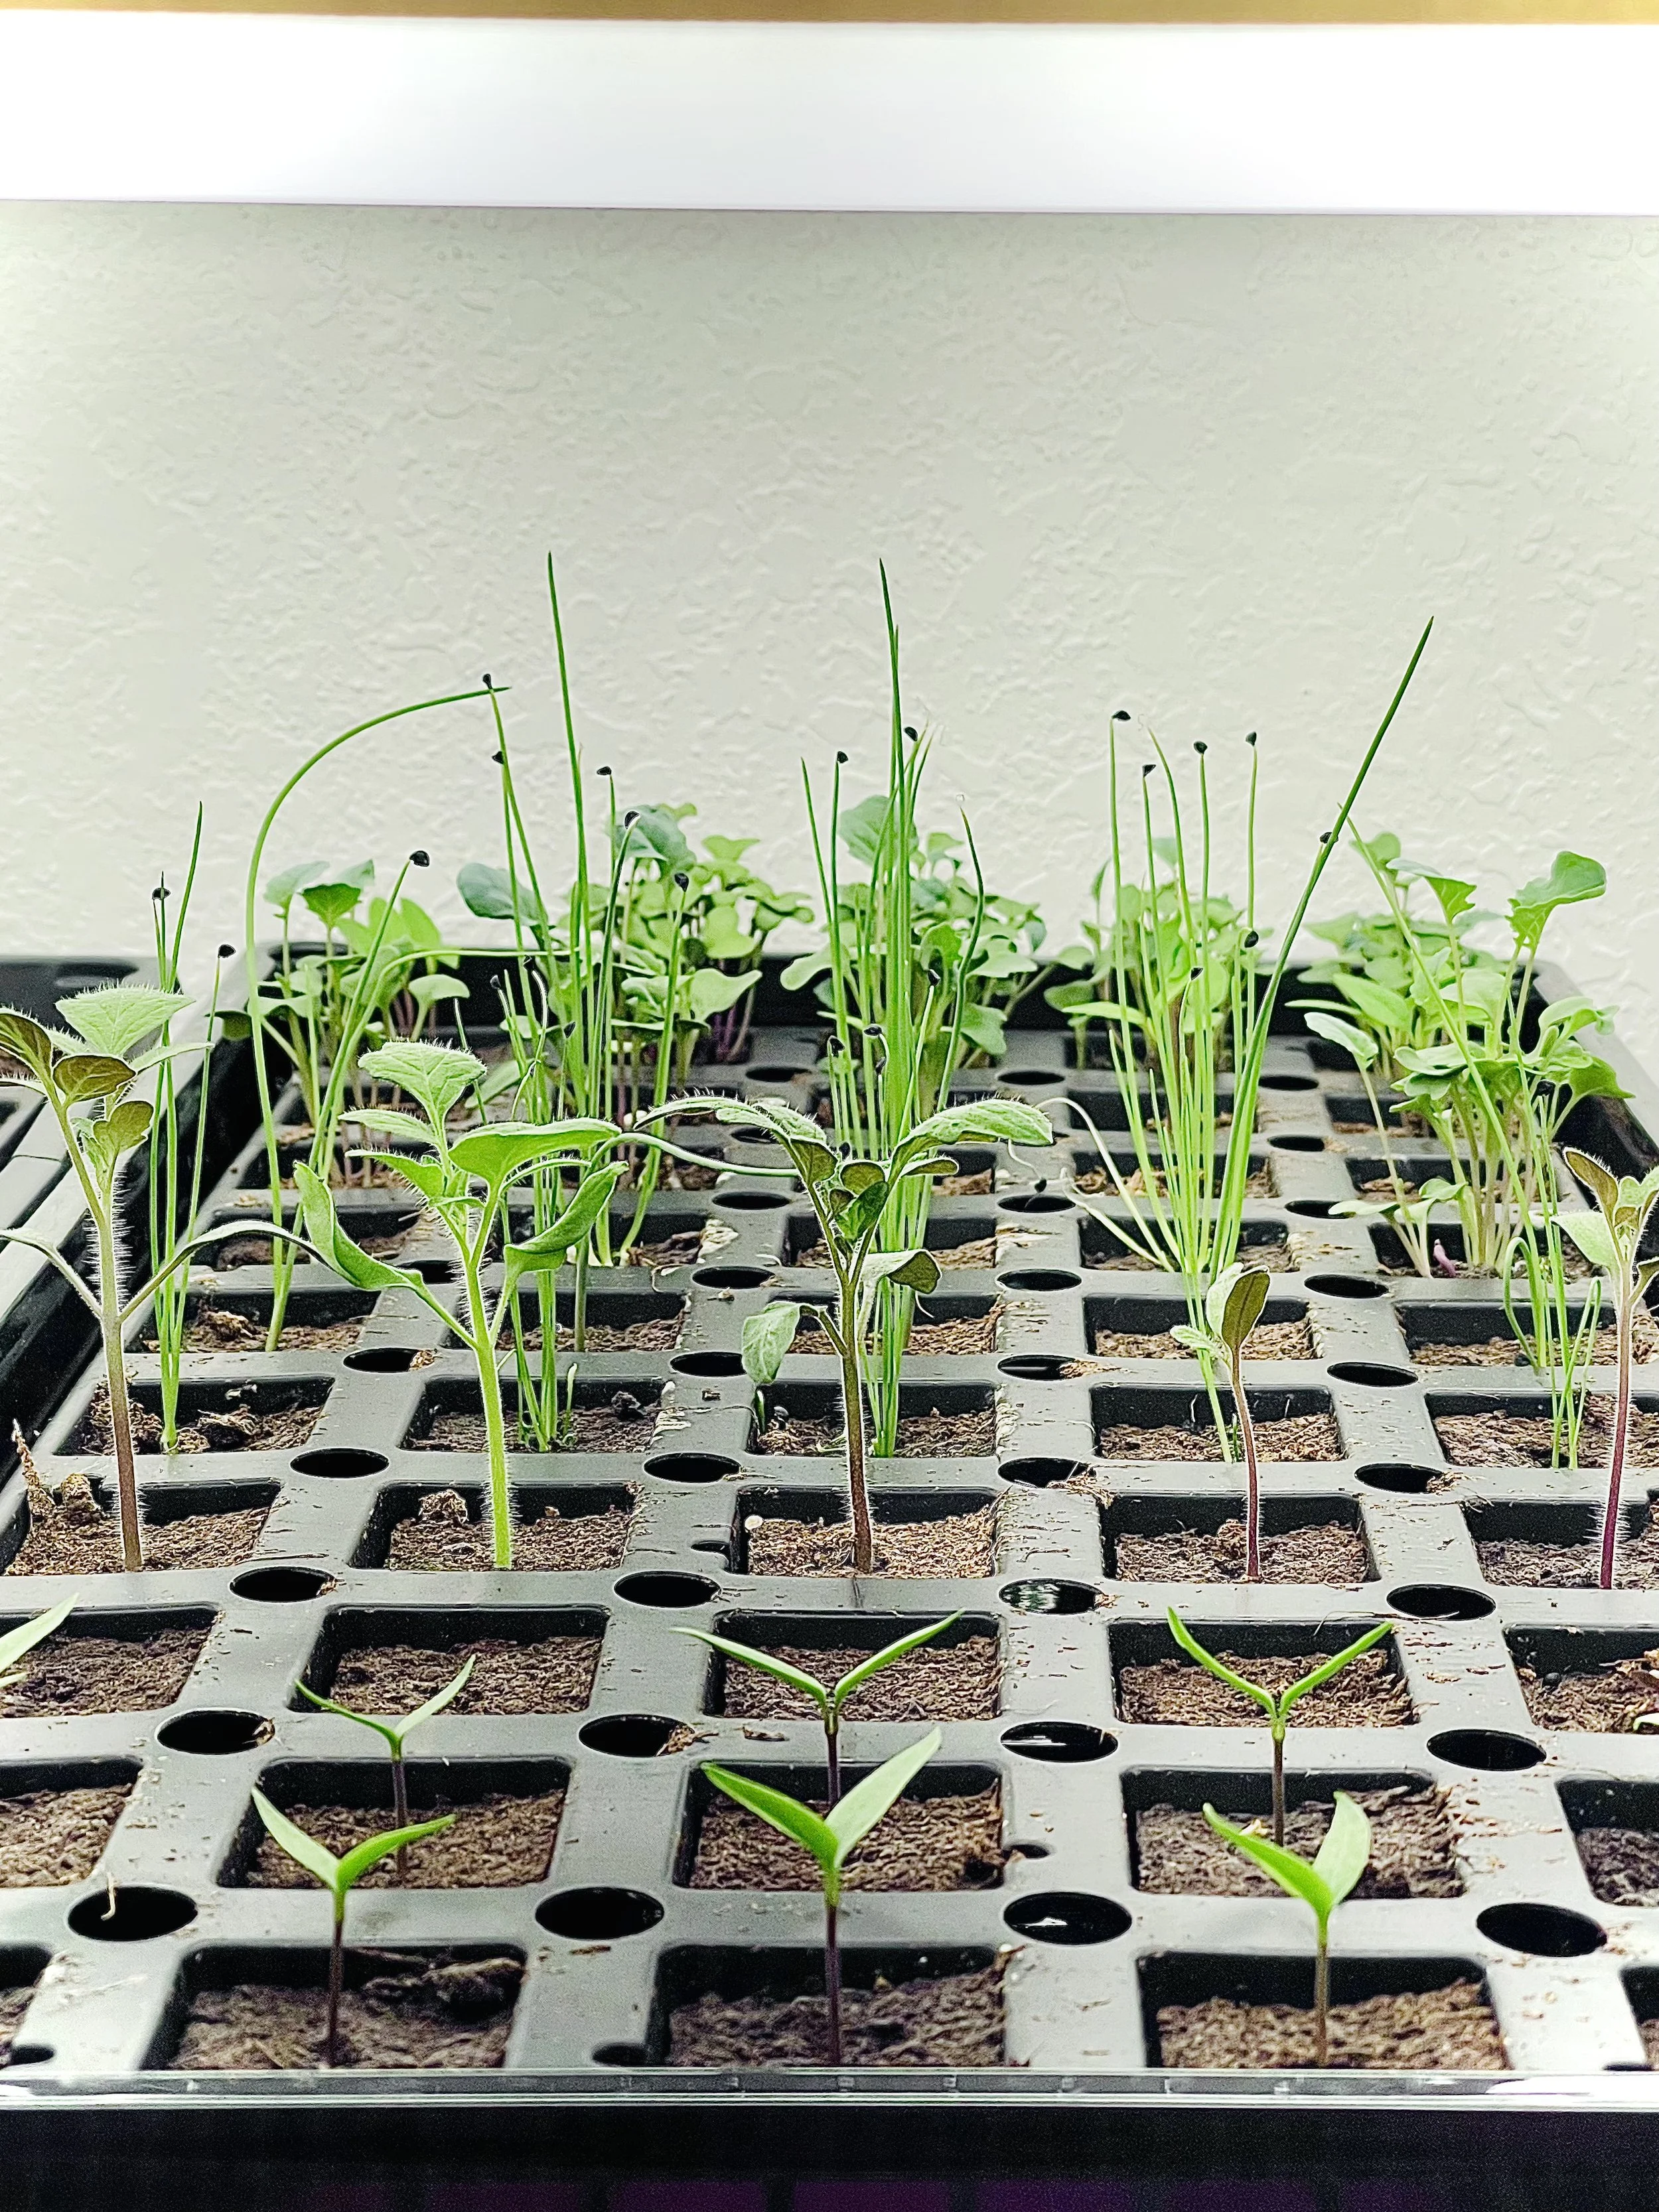
Indoor start tray
After years of trial and error, we have found that our best gardens come from starting seeds indoors. However, if the weather is warm enough in mid-spring, you can sow the seeds directly into the garden soil. Root plants like beets, radishes, and carrots should always be sowed directly into the garden to avoid any transplanting trauma. Follow the instructions on the seed packet for planting the depth of seeds and spacing for transplants grown indoors. You want to plant these a little denser and then thin them out later.
We have tried many different indoor seed-starting methods. So, you are in luck because we are going to share our favorite tested and trusted techniques with you! First, soak your seeds for 12-24 hours. We like to use an ice tray. We label the tray to know the top and bottom, then write a diagram grid on a piece of paper to remember, which seed is in which spot.
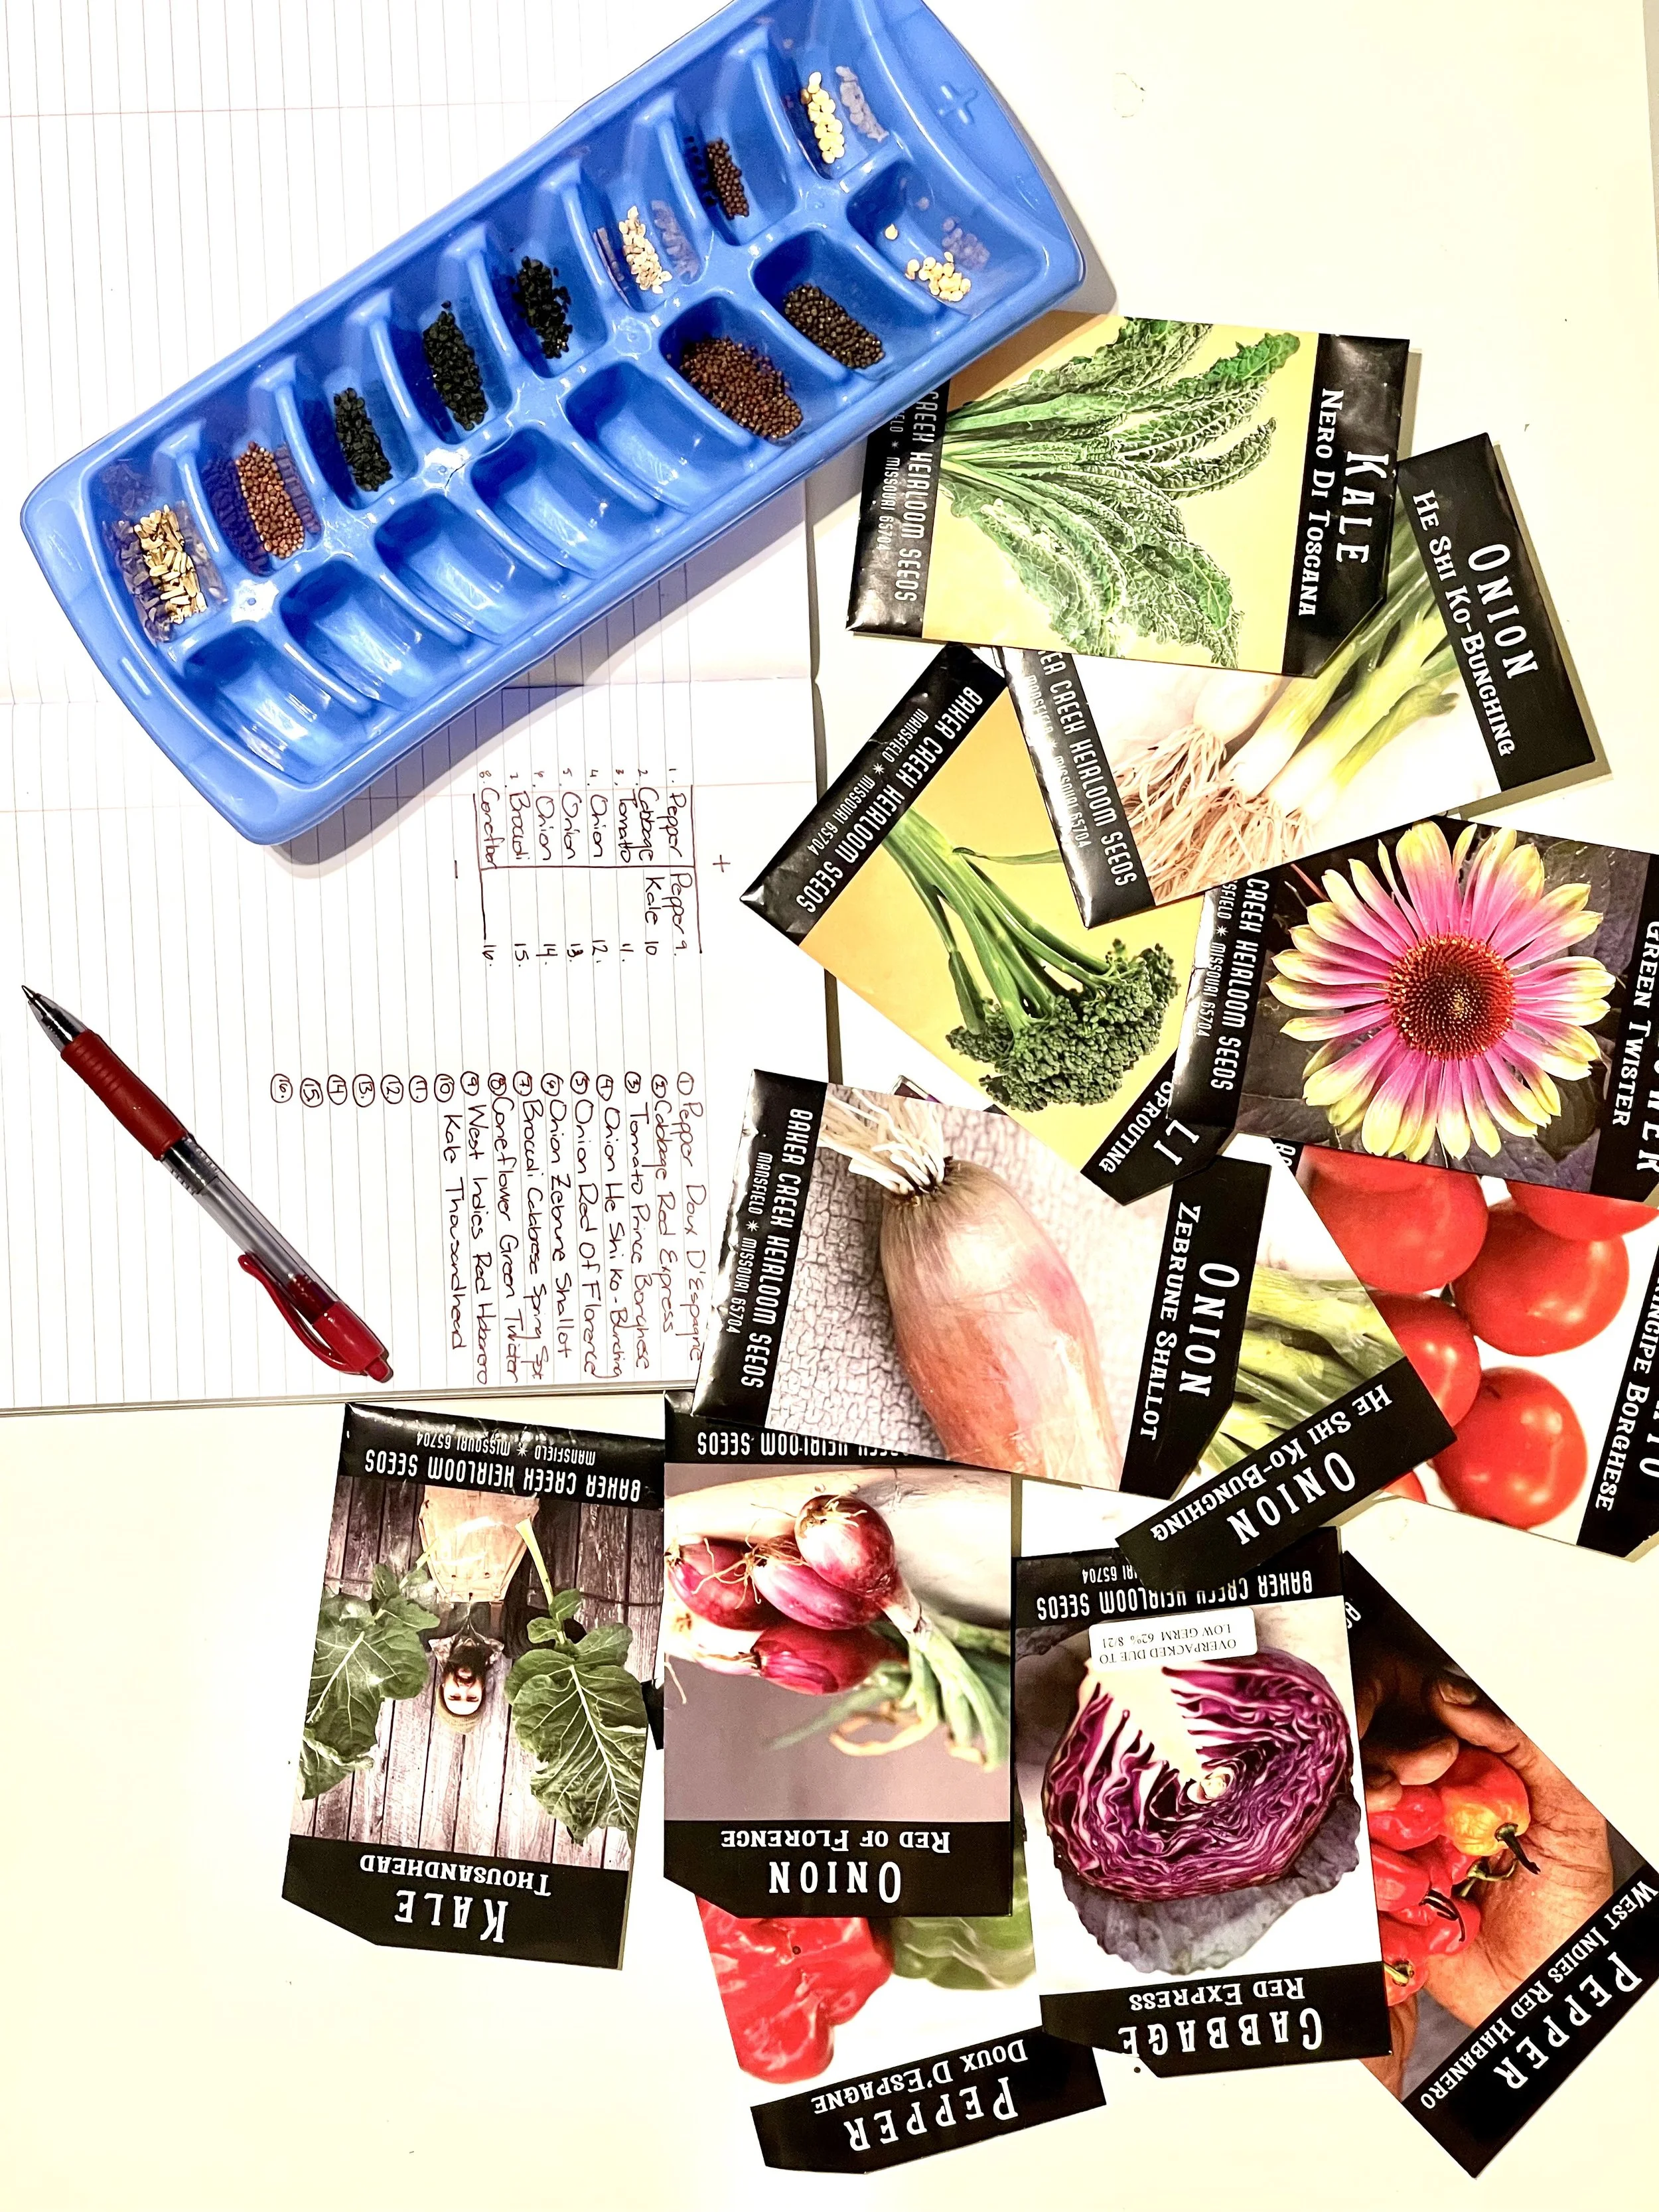
Soak the seeds……
Make a chart to keep track of your seeds. We started at one marked spot on the tray, then moved clockwise to give each space a number next to the seed name.
Keep them in a warm, dark area. I know this seems like extra work, but it gives the seeds a head start swelling and breaking through their hard seed shell. Next, fill your tray with a fine seedling mix and level it so you don’t get water puddles. Make sure the tray has good drainage holes and another tray to catch the water. Use tweezers to place each seed at the correct depth. Gently cover the hole with soil, and pat lightly to remove large air holes in the soil. We use a misting spray bottle to gently water our plants until they have a strong root system. Water plants daily and keep the tray covered with a humidity dome until they are about an inch tall with their true leaves.
Next, after planting your seeds, find a place where you can place the garden tray and keep the temperature 65-75 degrees F. If you only have a cold room, basement, or garage, you may want to purchase a seedling heating pad to place underneath your tray. We use an inexpensive digital thermometer and place it on top of the soil to keep track of temps.
Once your seedlings break through the soil and get their first two leaves, they will start to search for a light source of energy. You can place your tray in front of a bright window, or use a baker's rack shelving system with fluorescent lights hung above your tray. Turn the light off at night to let your plants sleep, then on again during the daylight hours.
That’s it! Now it’s time to daydream about your days harvesting all your wonderful fruits and vegetables.

Our collard greens grown and harvested summer of 2022!
Now that your spring garden is underway, remember to water your plants regularly and watch them grow! Gardening is a great way for children to learn about the environment and develop a deeper connection with nature.
Follow us @pawcastkids on social media for more ways to inspire kids to help make the Earth and themselves paw-some🐾! Don’t forget to check out Sinaya’s book “Come Meet the Rabbits: A Paw Cast Kids Animal Adventure”. Your kids will have a blast as they learn lessons about gardening, friendship, and life to help make our world a better place. Filled with fun, laughs, lessons, and facts, this story is sure to brighten your bookshelf and make you a Paw 🐾 Cast Kid! Your purchase helps Sinaya on her mission toward environmental justice. Purchase HERE!
(Blog author Ayana is a proud mother, wife, nurse, homeschooling parent, and mother to Sinaya, author, environmentalist, and owner and creator of Paw 🐾 Cast Kids. Sinaya and Ayana co-create content for Paw 🐾 Cast Kids to make our kids and our Earth paw-some🐾!)